BSBLIB303 - Session 3
Video Cameras
The largest video camera market would have to be the Action camera, most notably, the GoPro, but there are also other choices when it comes to creating video.

https://www.jbhifi.com.au/collections/cameras/camcorders

https://www.jbhifi.com.au/collections/cameras/action-video-cameras

https://www.jbhifi.com.au/collections/drones-robotics/4k-camera-drones
https://www.harveynorman.com.au/digital-video-camera-camcorders-buying-guide
https://www.finder.com.au/video-cameras
Camcorders

https://www.jbhifi.com.au/collections/cameras/camcorders
Action Cameras and GoPro

https://www.jbhifi.com.au/collections/cameras/action-video-cameras
Drones

https://www.jbhifi.com.au/collections/drones-robotics/4k-camera-drones
Video Mode - Digital Still Camera
You also have a range of compact, DSLR, and mirrorless digital still cameras t hat are capable of High Definition or even 4k video.
https://www.harveynorman.com.au/digital-video-camera-camcorders-buying-guide
https://www.finder.com.au/video-cameras
Taking video
When using movie mode, the stop and record button acts as a toggle. You press it once and it starts to record your video. Press it again, and the video will be paused. In most cameras, this will create a separate "clip".
A video camera will also take still shots, although not usually with the same quality as a still camera. Some video cameras will also allow you to take stills at the same time as you are recording video.
Different video cameras, still cameras, and smartphones may use different formats for saving video.
Class Activity 1
Do you record video at all? Why/Why not?
What do you do with your video? Do you share it on social media? What video applications or software do you use?
Video Resolution
https://www.digitalcitizen.life/what-screen-resolution-or-aspect-ratio-what-do-720p-1080i-1080p-meanVideo Editing Terminology
The concept of video editing is to watch your clip in the preview window, use the split tool to break the video into smaller chunks, and delete the bits you don't want. Digital video editing is non-linear and for most video editing software it is "non-destructive".Linear Vs Nonlinear
https://publit.io/community/blog/non-linear-video-editorsVideo editing Terminology
Split

The concept of splitting a video is the same as good old fashioned video editing. You "cut" out the bits that you don't want and stick it back together. In digital video though, the process is non-destructive.
Trim

When you split a video clip, you can "cut" out the bits that you don't want anywhere within the clip and this can be done multiple times in each clip. Trimming, however, allows you to only cut out video at the beginning or end of the clip. Different tools will use different terminology, but the process of editing videos in a linear video editing application is pretty much the same.
Filters
Many video editing applications allow you to add filters to your video such as changing to sepia or adjusting brightness and contrast. You can "cartoonise" your video or even use applications to face swap such as Reface.
Best Free video editing applications
There are lots of free video editing applications that cover all operating systems. Check out the features, compare them, even try out a few.
I have tried many free video editing tools, but for most of my video editing I use a subscription based video editing tool called Cyberlink Power Director 365.
Desktop video editing software
Android Mobile Video apps
iOS Mobile Video apps
General Mobile
Group Class Activity
In groups, you are to select 3 free video editing tools for your operating system and compare the features of each. If any of the tools are "freemium" outline what extra features you get with a paid version. Read some articles and/or use your own personal experience with any of the applications to complete the task.
Marketing Video apps
Marketing video apps provide clips that you can add to and/or edit to create short marketing videos for social media. Many of them have a basic free option as well as subscription levels for more features.
Here are a few samples that I have tried over the years, but there are so many of them that it is worth trying some for yourself.
Moovly
Moovly has a free option as well as subscription plans and plans for education.


Typito
Easy Video Maker to Create Stunning Text Videos. You can create up to 4 videos/month for free with Typito branding. You can remove the branding for a project for $10 or upgrade to any of the paid plans.

Flexclip
Amazing Videos Made Easy with FlexClip Video Maker. FlexClip is a simple yet powerful video maker that creates marketing videos and family stories in minutes.

Biteable
Make better videos than your competitors. On your lunch break.
Sell more stuff with stunning videos. Create content in minutes. See results in no time.

Adobe Spark
Free online video maker with music and pictures
Create compelling video content with ease! Piece together your footage with photos, music, voiceovers, and beautiful transitions from one scene to the next.

Canva

With Canva, you can make high-quality videos without being a professional video editor. You’ll find it easy (and fun) -- to make videos everyday. Our simple drag-and-drop tool lets you make compelling short videos in minutes using Canva’s library of pre-made templates.
Renderforest
Renderforest offers you the best online branding tools to create high-quality videos, logos, mockups and websites with minimal time and effort.

Class Activity 2
Select one of the above tools or a marketing video editing tool of your choice and create a marketing video to promote an event for Mysty River Regional Library Service. Share your end result with the class using screen share or post in our Facebook group.
Today we will look at a range of programs that you can use to showcase your photos/images. Some of these are part of your Office 365 account and others are free tools that you can find on the Internet.


These templates can be easily configured for the desired year or specific months within the year. It is important to choose the correct year and the correct months when choosing your template.
Click on Set Calendar Dates.


When you have set your dates and other details, click on the Create Button.


Things to consider:
Use the following steps to create your own Calendar.
Start with a Blank page - I used A4 Landscape.
File / New


Make this first page your cover page - I placed an image and a title on mine as well as a background colour.

Next step is to add your new page. I set mine up as a 2 page spread and so when I insert a page, it adds a double.

This is what mine looks like

I gave mine new page the same background as the front cover - just for consistency!

Add your images to the left hand side and your "calendar" to the right hand side.
To add an image, use Insert / Picture and select the image that you want on the page. Add any other enhancements such as frame or shadow if you want.

To add the Calendar part, use Insert / Calendar and Browse for more calendars so that you get more choices.


Move the calendar onto the right hand page and increase the size so it takes up the full page to the margins.
This is what mine looks like:

You can now create the rest of your calendar. You can insert Blank Pages and add the elements - i.e. Image on left and calendar on right, or you can add Duplicate Pages and delete/edit the elements.

When you have added all of the months, add a single page at the end. This page will contain thumbnails of your original photos/images.


You can staple it or be fancy and buy a set of covers and coil binder from the library or use a hole punch and some nice ribbon to finish it off.


The idea of using a template is that they are easy to modify and each layout section has a placeholder already there for you to just add an image.


http://mashable.com/2016/04/23/smartphone-photos-products/#_
https://www.officeworks.com.au/print/print-and-copy/photos-and-photo-gifts
http://www.momento.com.au/
http://www.photobookaustralia.com.au/
This is something that I would like to do - I have the perfect spot in our entrance!
https://designmywalls.com.au/
https://www.customwallpaper.net.au/
https://dtopshop.com.au/
Microsoft Publisher
Creating a Calendar
From a Template
When you open Publisher, or when clicking the file tab > new, you are shown a catalog of templates to choose from to create a new publication. The catalog is divided by categories; one of theses categories is calendars. Choose a calendar from the list of installed templates.

These templates can be easily configured for the desired year or specific months within the year. It is important to choose the correct year and the correct months when choosing your template.
Click on Set Calendar Dates.


When you have set your dates and other details, click on the Create Button.

Editing Your Calendar
After choosing your preferred dates, you can replace the image for each month with one of your own.

Things to consider:
- A theme that compliments your imagery
- Fonts that compliment your theme/imagery
- Titles and/or descriptions that will assist the reader in understanding your calendar
Creating a calendar from a blank page
Personally, when creating a Calendar, I prefer to start from scratch!! I like the idea of a traditional calendar like you might buy from a newsagent - a full size picture and a full size calendar.Use the following steps to create your own Calendar.
Start with a Blank page - I used A4 Landscape.
File / New


Make this first page your cover page - I placed an image and a title on mine as well as a background colour.

Next step is to add your new page. I set mine up as a 2 page spread and so when I insert a page, it adds a double.

This is what mine looks like

I gave mine new page the same background as the front cover - just for consistency!

Add your images to the left hand side and your "calendar" to the right hand side.
To add an image, use Insert / Picture and select the image that you want on the page. Add any other enhancements such as frame or shadow if you want.

To add the Calendar part, use Insert / Calendar and Browse for more calendars so that you get more choices.


Move the calendar onto the right hand page and increase the size so it takes up the full page to the margins.
This is what mine looks like:

You can now create the rest of your calendar. You can insert Blank Pages and add the elements - i.e. Image on left and calendar on right, or you can add Duplicate Pages and delete/edit the elements.

When you have added all of the months, add a single page at the end. This page will contain thumbnails of your original photos/images.


Creating your Image Page
Create your thumbnail page by adding each image, resize as appropriate, and move into position. For 12 months, a 4 X 3 grid would work well. You could also create a collage in Pixlr and add your grid as 1 image.
Printing your Calendar
Finish off by printing your calendar in colour. Print it double sided as you want the picture and calendar to be displayed when you open it up. Think about the flip - do you flip it on the long side or the short side?You can staple it or be fancy and buy a set of covers and coil binder from the library or use a hole punch and some nice ribbon to finish it off.
Class Activity 3
Try creating a calendar using your images.Creating a Photobook
In Publisher, there are heaps of different layouts to suit lots of projects. Included are a couple of templates that can be used for Photo Books.


The idea of using a template is that they are easy to modify and each layout section has a placeholder already there for you to just add an image.
Class Activity 4
Using photos and a template of your choice, create a photobook in publisher.
Microsoft Sway
Sway is part of your Office 365 subscription. It is essentially like a simple website that you can create and share. Lots of templates available, including portfolio (photo collage) or you can start one from scratch.
You can use Insert to add cards or you can just drag and drop your images on to the Sway. Cards can contain images, media and/or text.
Images can be grouped in a variety of different formats.
The following screenshots show how you can add cards to Sway as well as grouping images.
Once you have all of the cards that you want in your Sway, you can go into the Design area. You can choose from a range of templates or let Sway choose for you.
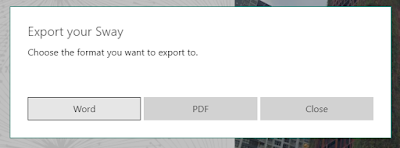
You can also Export your Sway out in different formats such as Word or PDF.
Class Activity 5
Try creating a simple photo gallery using Sway
Online image sequencing
There are a number of online sites that allow you to create a slideshow video using your images, with many of them free. The concept is that you choose a theme, add your images and any text, then publish the video. Here are some examples:
Adobe Spark
Adobe Spark is very simple to use and like Sway, you can drag and drop onto each "slide". Once complete, you can add music, change your theme, preview your slideshow and Share or Download it.
Kizoa
Pholody
There are heaps of others with varying free features.
Class Activity 6
Try creating an online photo slideshow using one of the above tools or similar
Windows Photo App
The Windows 10 photo app allows you to create a photo sequence video. Simple and easy to use.Once you have your sequence complete, you can add background music or custom audio file and then Finish your Video
Links for some other Ideas
http://mashable.com/2016/04/23/smartphone-photos-products/#_
https://www.officeworks.com.au/print/print-and-copy/photos-and-photo-gifts
http://www.momento.com.au/
http://www.photobookaustralia.com.au/
This is something that I would like to do - I have the perfect spot in our entrance!
https://designmywalls.com.au/
https://www.customwallpaper.net.au/
https://dtopshop.com.au/


Comments
Post a Comment